Sounds of Sortomme’s Teaching Tips
January – April 2015
View Past Teaching tips:
Sept-Dec 2014
May-Aug 2015
April: Visual Aids
Visual aids engage attention and participation when teaching and make great recital décor.
When making your own visual aids or posters make sure to use images and words large enough to read from a distance of 20 or more feet.
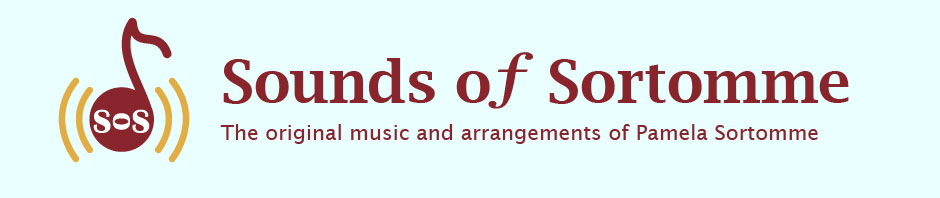
Student art can be used to engage participation, though that will take additional preparation time. If using student art, give the students the materials to use to encourage uniform size. For example I gave each of my students a surf board cut out all the same size, but let them choose the color and how to decorate it for a recital. I sent home instructions (they each needed to depict their piece in art) with their cut outs several weeks ahead with a date when I need it returned.
Clip art is a great resource as long as it is large enough. “Learning Through Music” has the patterns for visual aids for each song. Poster board and card stock hold up well. I use the large craft sticks glued on with hot glue for hand-held puppets and include words on the back if needed. I also number visual aids so we don’t mix up the order when using them.
March: Practice Perfect
Students need to be taught how to practice perfect. Most students just want to play a song even if they don’t know it first. The words “SLOW DOWN” are familiar to most music teachers. It can help to explain that we are teaching our fingers the song and that we have to give the muscles lots of practice before they have the “muscle memory” to always play the song correctly.
If we can play a piece well slowly than we can play correctly when we speed up to the tempo the piece is to be performed at.
A good test at how proficient a student is on a piece is to listen to the first time the piece is played. That’s the average. If there are lots of mistakes and it is only played well after several attempts, then the piece is not finished.
Try this free handout I use for my students to teach them how to practice.
Download
February: Let’s Take a Road Trip- Theme for Recitals

Themed recitals and concerts are fun! Music, decorations, simple props (where appropriate), programs and refreshments (if you have them) that fit the theme enhance the program experience and often create a higher level of enthusiasm with the students. First choose your theme with the music in mind. For example, last year “Let’s Take a Road Trip” was the spring recital theme. The programs were printed on a copy of an old map, (we hand stamped a car on each but you can add clip art) the music was a journey of taking a road trip, each student was given a blank poster to make a picture to go with their song title, and used for the decor. Even the recital reminders had cars printed on them. The students were so excited! Here is a list of the piano music found here at our web site that we used for our theme. (We also mixed up the level ability order to follow the theme and the students really liked that too instead of beginning with the easiest pieces and graduating to the hardest.) We will share more recital themes in the future.
Let’s Take a Road Trip
Going Places- Level 2
Hit the Road- Level 4
Changing Lanes- Primer Piano
Caught in a Storm -Level 1
There’s a Rainbow- Level 4
A Sunny Day -Level 1
Ants at Our Picnic Primer Piano
Truckin’ Down the Road -Level 2
What’s on the Radio? -Level 3
Are We There Yet? -Blues Level 1
At the Dinosaur Museum- Level 1
Sunset -Level 2
Azure -Lake Level 4
Through the Mist -Piano and Flute (or violin) Duet early Intermediate Piano
I’ll Take Fries with That- Early Intermediate
Skunk in the Road- Intermediate
In My Dreams (of Home) Intermediate
January: Marking Music With Students
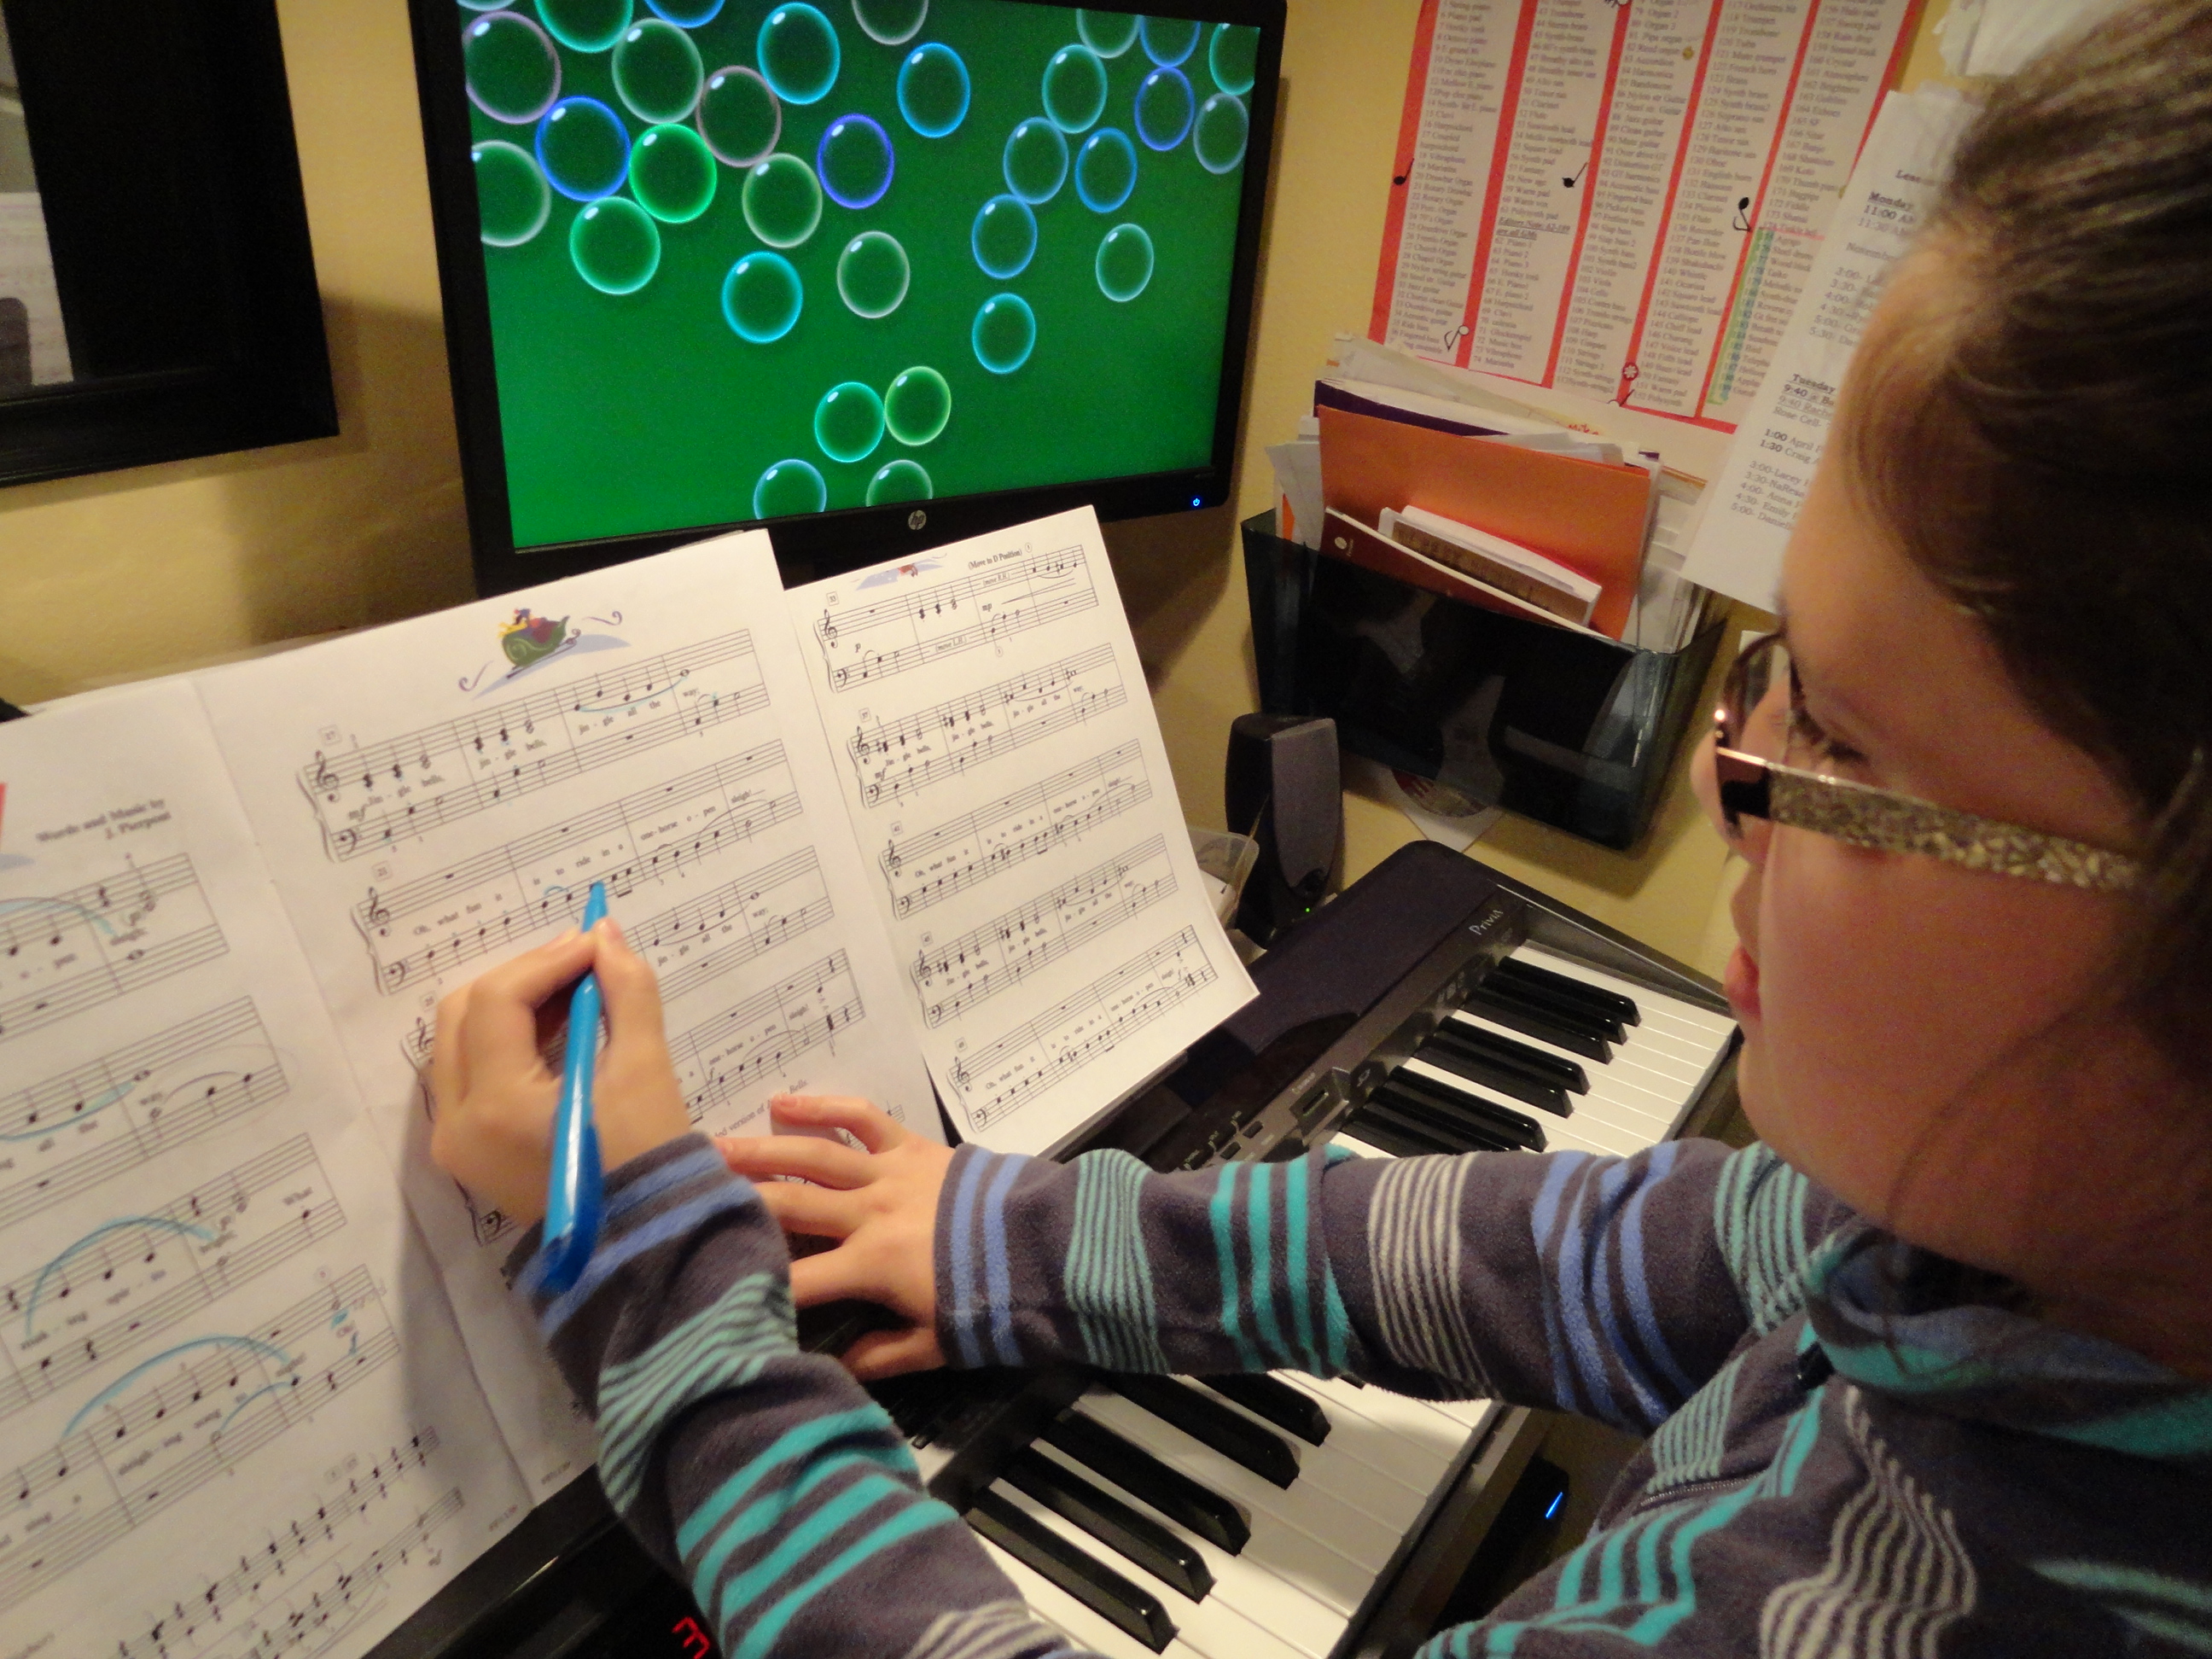
I tell my students that ” Making music is a piece of cake!” I use colored highlighters:
Pink and yellow – the cake : you want to have a tasty cake!
Blue– the frosting : frosting makes every cake taste even better!
Green- the decorations make the frosted cake look and Awesome!
Pink and yellow highlighters for notes: sharps, flats, accidentals, repeat signs, and markings note related.
I use yellow to mark the rests if the student is forgetting to play them.
Blue highlighters are for phrasing markings such as 8 VA, pedal markings, tempos and tempo changes, and articulation markings, such as
staccatos, fermatas etc.
Green highlighters are for all dynamic markings, p, mp, mf, f ff, crescendo, dimuendo etc.
I have the students make the music themselves , with my supervision (White Out is helpful for mistakes). This makes learning more effective than if I do it for them. By having them physically mark music it engages their attention and focus on learning and recognizing the
notes, key signatures, and markings in the music. It also creates a stronger memory. Plus it is really fun! Have you ever met a student who didn’t like to color on their assignment? Try it the students really enjoy this process.
Use this method on Changing Lanes-Primer, Rachel Has the Blues-Level 1, Crazy Song- Level 2, Gypsy Dance,-Level 3, It came to Pass- Level 4, and Banana Peel Blues- Intermediate piano pieces as well as any other music.
Download the PDF handout here! Download


